
Crafting something by hand is a labor of love, and attaching the right label is the perfect way to finish your masterpiece. With this guide, you're well on your way to ensuring your knitting and crochet projects are not just made by you, but are unmistakably yours.
Identifying Your Craft with Knitting and Crochet Labels
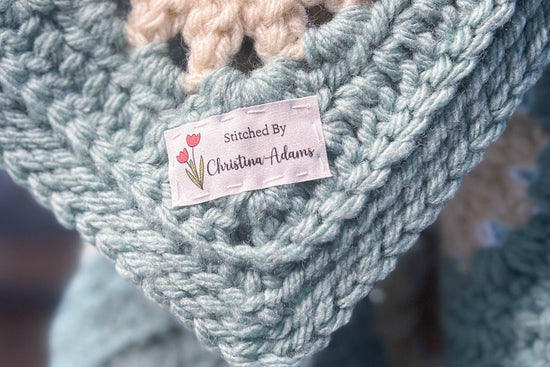
Imagine your knitted sweaters and crocheted blankets, years from now, still warming someone's heart and home. A label is more than a tag; it's a testament to the creator's skill and affection.
For items that often become heirlooms, knitting labels and crochet labels serve as a lasting connection between the maker and the recipient.
They also add a professional polish to your work, making your handmade gifts even more special and your knitting projects and crochet gifts truly memorable.

Types of Fabric Labels: From Cotton to Satin
Selecting the right material for your sewing labels can significantly impact the look and feel of your finished projects. Cotton sewing labels offer a classic charm perfect for most knitting and crochet works, while satin labels add a touch of luxury and smoothness that's hard to resist. Each material, from cotton to satin, has its place, depending on the style and utility of the handmade item. Custom tags further allow for personalization, ensuring every piece you create is uniquely yours.
Cotton Labels:
- Full Color: White labels can be printed in full color or black and white
- Flat or Folded: Your choice of finishes
- Fray Proof: Laminated backing prevents fraying
- Sew on or Iron on: Your choice of backing type
Satin Labels:
- Black Ink: White satin ribbon printed with black ink
- Folded: Labels are set up as folded with cut edges at the top and bottom
- Cut edges: top and bottom edges need to be turned under or finished
- Sew on: Satin ribbon is ready to be hand or machine-sewn
Essential Sewing Labels for Small Projects
Attaching Fabric Labels: Methods and Tips
Sewing on Cotton Labels
Sewing on cotton labels is a cherished tradition that combines durability with timeless charm.
Whether you're opting for a subtle placement or making a bold statement with a prominent spot and bright thread, sewing labels onto your projects adds a personal touch that's both visible and tactile.
Below, we'll explore two methods: hand sewing and machine sewing, each with its own advantages.

"A label on a handmade item is the final stitch that completes the masterpiece."
Hand Sewing: The Personal Touch
Hand-sewing your labels onto projects is not just about attachment; it's about imbuing your item with extra care and personalization. Here’s how to do it:
- Placement : Decide on the label's placement. A visible spot with contrasting thread can serve as a striking design element.
- Thread Choice : Choose a thread that complements or contrasts your project and label for added flair.
- Stitching : Use a simple running stitch or a decorative blanket to secure the edges of the label, ensuring it's both secure and neat.
Hand sewing is perfect for those who enjoy the meditative process of stitching and for projects that require a gentle touch, particularly delicate yarns or thick materials that might not fare well under a sewing machine's pressure.

Machine Sewing: Quick and Durable
For those who value efficiency or are dealing with a high volume of items, machine sewing is the way to go:
- Preparation : Place the label in your desired location and iron lightly to hold in place if desired.
- Thread Selection : Choose a thread color that stands out or blends in with your label and fabric, depending on the desired effect.
- Sewing : Use a straight or zigzag stitch to securely attach the label on all sides. A zigzag stitch can add an extra decorative touch while securing the label firmly in place. If your item is very thick, you may have to lighten your pressor foot pressure to accommodate the extra thickness.
Machine sewing is ideal for projects that require a sturdy attachment, especially for items that will be washed frequently or used heavily.

Ironing on Cotton Labels: A Quick Alternative
Ironing on labels offers a no-sew, efficient alternative for attaching labels to your knitting and crochet projects. When using a regular iron-on label from EverEmblem specifically designed for yarn projects, the process is streamlined to ensure a strong bond without damaging your handmade item.
Here's how to do it:
- Heating : Set your iron to a hot dry setting, as steam is not necessary and could hinder the adhesion process. EverEmblem's iron-on labels for yarn projects are designed to adhere with only about 3 seconds of heat application.
- Application : Place the label on your project in the desired location. Apply firm pressure with the iron, focusing especially on the edges of the tag to ensure complete adhesion. It’s crucial not to exceed the recommended heating time, as overheating can inactivate the adhesive, rendering the label less secure.
- Protecting Delicate Yarns : If your project is made from very delicate yarns or materials that could melt, it's wise to protect the exposed yarn. Cover the label with a pressing cloth or parchment paper before applying heat. This step ensures that direct contact with the iron does not damage the yarn.
- Cooling : After ironing, allow the label to cool completely before moving your item or testing the label’s adhesion. This waiting period ensures the adhesive sets properly, bonding the label securely to your project.
Ironing on labels is particularly suitable for projects that need a quick labeling solution or when sewing isn’t feasible. With EverEmblem’s labels, you can achieve a professional, durable result in just a few seconds, ensuring your projects carry your mark with pride.

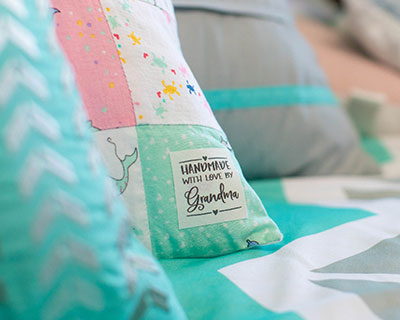
A carefully designed label is a silent ambassador for your brand, conveying elegance, quality, and reliability without a word
Sewing on Satin Labels for a Luxurious Finish

Satin labels bring a touch of elegance and luxury to any knitting or crochet project. Their smooth texture and sheen elevate the finished piece, making it stand out. However, due to cut edges, satin labels require a bit of preparation to ensure their edges don’t fray over time.
Here’s how to prepare and attach your satin labels properly:
-
Sealing the Edges: Before attaching the label, ensure the cut edges (top and bottom) are sealed to prevent fraying. There are a few methods to do this:
- Folding Under: Fold the edges under and press them before sewing the label onto your item. This method hides the raw edges completely.
- Fray Check: Apply fray check along the edges of the label and allow it to dry completely. Fray check is a liquid sealant that prevents the edges from unravelling.
- Flame Sealing: For a quick seal, you can carefully pass the cut edges of the label through a small flame. This melts the very edge of the fibers, sealing them. Exercise caution with this method to avoid singeing the label or causing injury. A quick pass is all that’s needed.
- Sewing On: You can sew the label onto your project once the edges are prepared. Whether you’ve folded the edges under or sealed them with fray check or a flame, stitch the label securely in place, choosing a thread that complements or contrasts with your project as desired.
Satin labels, with their smooth & luxurious finish (as well as their economical price), are perfect for special gifts or items meant for sale. Preparing the labels properly ensures they will remain intact and beautiful for the life of the item, adding a professional touch to your handmade projects.
Best Practices for Attaching Labels to Your Projects
When attaching labels to your knitting and crochet projects, the method you choose affects not only the item's aesthetic but also its longevity and care requirements. Here are some key considerations to ensure your labels remain intact and your items look great over time:
Choose Sewing for High-Use Items
For items requiring frequent washing or heavy use, sewing the labels is recommended. This method provides the greatest strength and durability, ensuring that your label remains securely attached, wash after wash. Whether hand sewing or using a machine, a securely stitched label will withstand the rigors of regular use.
Care Instructions for Labeled Items
Taking care of your labelled items properly can significantly extend their lifespan and maintain their appearance. We recommend the following care instructions for items with labels:
- Wash Delicately: Always opt for the delicate cycle when washing items that have labels attached. This gentler approach helps to preserve both the fabric of your item and the integrity of the label.
- Tumble Dry on Low: High heat can be detrimental to both your handmade item and its label. Tumble drying on a low setting helps to prevent damage and ensures that your project remains in pristine condition.
- Avoid High Heat on Iron-on Labels: For items with iron-on labels, direct high heat from an iron can reactivate the adhesive, potentially causing the label to shift or become less secure. Use a pressing cloth and iron around the label whenever possible.
By following these best practices, you can ensure that every item you create not only looks beautiful upon completion but remains beautiful through many uses and washes. The right attachment method, coupled with proper care, makes all the difference in preserving the quality and appearance of your knitting and crochet projects.
As you venture into the world of fabric labels for your knitting and crochet projects, remember that each label you attach is a reflection of your passion and pride in your work.
It's not just about following a trend; it's about claiming ownership of your craft and sharing a piece of yourself with the world. So go ahead, choose your labels, pick your method, and start labeling your creations with confidence and style.
And remember, for the ultimate in custom label design and inspiration, everemblem.com is your go-to resource.
Related Readings
Related product

Signature with Love (2"x1"-Cotton)
$16.00

